The short version of building a horse arena: pick the site carefully, pull the permits, hand off the technical work to people who do it for a living, write a lot of checks, and wait eight to sixteen weeks for an indoor build (three to six for outdoor) before the first horse walks on the surface. A 60 by 120 indoor arena costs $90,000 to $250,000 in 2026 depending on finish level. An outdoor of the same size lands at $20,000 to $60,000.
That paragraph answers most of the search. The harder questions are the ones an owner has to answer before any of the checks get written, and they’re not really technical questions. They’re decision questions. What size, on what part of the property, finished how, paid for how, and what parts will the owner physically touch versus hand to a pro.
This guide is written for the person making those decisions. Not the contractor who shows up to do the work. The technical sequence – what the crew actually does in what order, with what specs – lives in the horse arena construction guide.
Quick Answer (2026)
Total build time, indoor 60×120: 8–16 weeks (10 typical for a clean build)
Total build time, outdoor 60×120: 3–6 weeks
Indoor cost: $90K–$250K depending on finish
Outdoor cost: $20K–$60K
What an owner can DIY: site selection, permit paperwork, basic outdoor footing, rail fencing, fit-out
What to hire out: grading, drainage, base, foundation, steel erection, fiber/engineered footing
The rest of the article walks through the decisions in order, what each step actually feels like from the owner’s side, and the regrets that show up later.
Before Any Ground Breaks
This is where most arenas are won or lost, and it happens before a single contractor has been called.
Where the arena goes. The site decision shapes every other cost. Flat ground with less than 5 percent natural slope is cheap to prep. Steeper ground means cut-and-fill that adds $10K–$30K. The natural low spot of the property is the worst place to build because surface water collects against the foundation, and four years later the base is rotting from the bottom. A tree line within 50 feet of the building drops leaves on the roof and casts shadow that slows drying after rain. The long axis of the building should run roughly north-south or northeast-southwest in most US regions so the rising and setting sun doesn’t blind riders working on the rail.
Walk the property with the question in mind. An owner can usually pick a site with a basic understanding of where water flows after a storm and where the dry, level part of the property is. A civil-engineering surveyor for $500–$2,000 is worth it if the site is borderline or the county wants a stamped site plan.
Permits. Most US counties classify a riding arena as an agricultural or accessory building, which carries lighter requirements than residential construction. Standard package: building permit, site plan, sometimes a stormwater plan, occasionally a wind-load engineering stamp in high-wind regions (coastal Florida, Texas Hill Country, the Outer Banks). Permit review runs 2 to 6 weeks in normal counties, 6 to 10 weeks in places with heavier processes (Pacific Northwest, coastal California, much of New England).
Owners can handle the permit application themselves in most agricultural counties. The form is short, the fee is moderate, and the county staff usually walks first-time applicants through it. In suburban or HOA areas, hiring a permit expediter for $500–$2,500 saves weeks of back-and-forth and is almost always worth it.
Budget. The honest version of the budget includes the kit, the site work, the foundation, the footing, the lighting, the doors, the permits, and the general-contractor margin if a GC is managing the project. Owners who plan against the steel kit price alone (the number most manufacturers advertise) discover the rest of the bill at the wrong time. A useful rule of thumb: take the kit price and multiply by two and a half. For a $40,000 kit, plan a $100,000 total build budget. For a $120,000 kit, plan $300,000. The fancier the finish, the more the multiplier creeps up.
The Decisions that Actually Shape the Project
Six decisions matter more than the rest, and they all happen in the first month.
Indoor or outdoor. Outdoor cuts the cost by 65 to 75 percent. Indoor adds year-round riding, full lighting, and weather independence. Owners who ride less than three days a week, in a mild climate, often get more value from outdoor with a covered shelter for tack and a few months of “we’ll skip the worst weeks” attitude. Owners who ride consistently or run a business based on the arena are buying indoor for the operational reliability.
Size. 60×120 is the standard private size and the floor of “useful.” 70×140 is more comfortable for most owners after the first year. 80×200 holds a full dressage court with a safety margin. 100×200 is commercial territory. Most regret stories center on building 60×100 to save money and wanting 60×120 inside eighteen months.
Structure type. Steel clear-span is the default for anything over 70 feet wide. Fabric tension structures are a real alternative in moderate-snow regions, and a wood post-frame still has a place for arenas under 60 feet wide with a particular aesthetic preference. Steel wins on cost above 60 feet wide in 2026, which surprises owners who haven’t shopped in a few years.
Footing. The single most variable budget line. Plain sand at one extreme, a $50,000 branded engineered blend at the other. The footing decision deserves its own evening of research; the horse arena footing guide covers materials, layer engineering, ranked picks by discipline, and what changes by climate.
Who manages the build. Hiring a general contractor adds 15 to 25 percent to the managed portion of the budget. Acting as the owner-GC saves that money and adds roughly 20 to 40 hours of phone calls, scheduling, and showing up to coordinate subs. Owners who have built houses before usually manage it fine. Owners who have never coordinated a multi-trade project should pay the GC fee.
When to break ground. Spring is the most common start window because the crew can work through summer and the build is closed in before winter. Fall starts work in mild climates. Winter starts in northern states usually pause for frozen ground from late December through February, and the resulting schedule pushes the first ride into the next summer.
What an Owner Actually does Themselves (and What to Leave Alone)
The honest list.
Site selection. Yes. An owner who walks the property after a heavy rain, watches where water collects, and avoids the obvious bad spots picks a better site than a contractor who shows up for one hour with a tape measure.
Permit paperwork. Yes in agricultural counties. Outsource in suburban or HOA areas.
Site grading and base. No. This is the single largest determinant of long-term arena performance. A handy owner with a small tractor cannot match a laser-controlled grader compacting crushed rock to 95 percent Proctor density. Owners who DIY this step are signing up for the failure mode that destroys most private arenas inside five years.
Drainage trench. Maybe. An owner with a backhoe and a free Saturday can dig the perimeter trench. The geotextile and pipe install should go to whoever is doing the base, because the two have to be sequenced together.
Foundation pour. No. Misaligned anchor bolts kill the steel kit before it goes up. The concrete crew has to have poured arena foundations before, and the bolt template has to be set with the building manufacturer’s spec in hand. This is not a learn-as-you-go step.
Steel kit erection. No, unless the owner has prior steel-erection experience and access to the right equipment. Self-erecting voids most manufacturer warranties, and the safety risk of dropping a 30-foot rafter on someone is real. Most US Patriot Steel customers buy the kit and contract erection through a referred installer in their state.
Footing install. Maybe. An owner with a tractor and a drag can install plain concrete sand acceptably. Fiber and rubber blends should go to a pro because the mixing ratio and even spread are difficult to achieve with general-purpose equipment. Engineered branded footings have to be installed by a certified crew or the warranty doesn’t apply.
Rail, mounting blocks, letters, mirrors. Yes. This is the part owners enjoy most because the building is up and the arena finally looks like an arena. Pipe fencing comes in pre-welded panels and bolts together. Letter markers and mounting blocks bolt on with no special skill. Mirrors for the dressage end need a level and patience.
What the Build Feels Like, Month by Month
The owner side of a 10-week indoor build is mostly waiting punctuated by decisions.
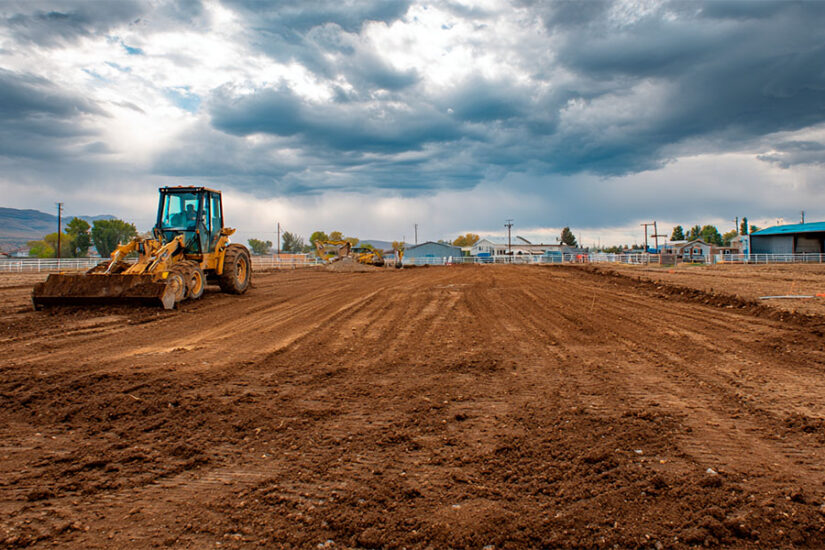
Week 1. The crew strips topsoil and grades. The site goes from pasture to a rectangle of bare dirt with stakes at each corner. This is the first moment the project feels real, and it almost always feels too small. Standing in the rectangle, looking at the bare ground, the dimensions don’t match the imagined arena. Wait for the building to go up before judging the size.
Week 2. Base and sub-base. Trucks come and go with crushed rock. The arena footprint gets a layer that looks like a driveway. This is the dullest week to watch but the most important week in the build.
Weeks 3–4. Foundation pour and cure. The perimeter concrete strip is poured, anchor bolts are set, and the slab waits. The waiting is the hard part – seven to ten days of nothing visible happening while the concrete reaches design strength. Pace this week with non-arena projects.
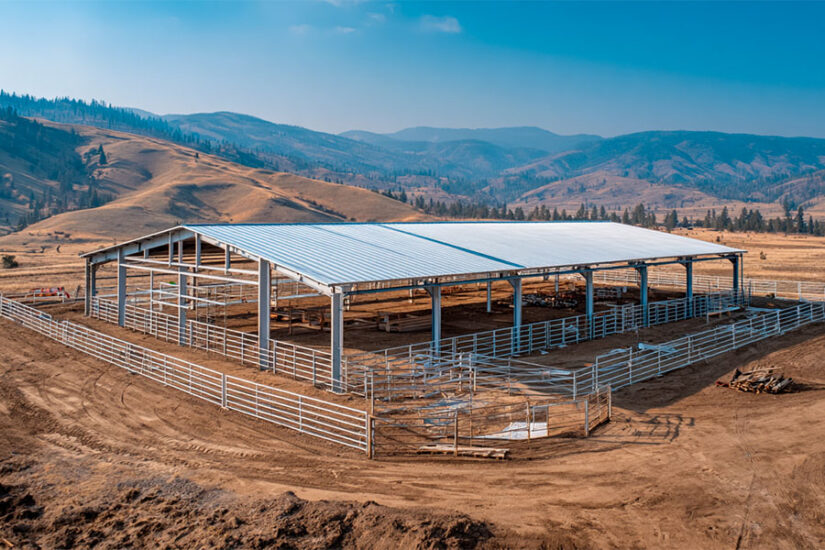
Weeks 5–6. Steel erection. The kit arrives on flatbeds (one to three loads, depending on size), and the crew sets columns, rafters, purlins, and roof and wall sheeting. This is the dramatic part of the project. A bare slab on Monday is a steel building on Friday. Most owners spend more time watching than they should and get nothing else done these two weeks.
Week 7. Doors, windows, electrical rough-in. The building has walls but no power. Lighting fixtures are mounted but not wired yet.
Week 8. Footing install. Trucks bring sand. The skid steer spreads it, the crew waters it, the drag levels it. The arena finally looks like an arena. Resist the urge to walk a horse on it. The surface needs about a week of riding-in before it settles to its working profile.
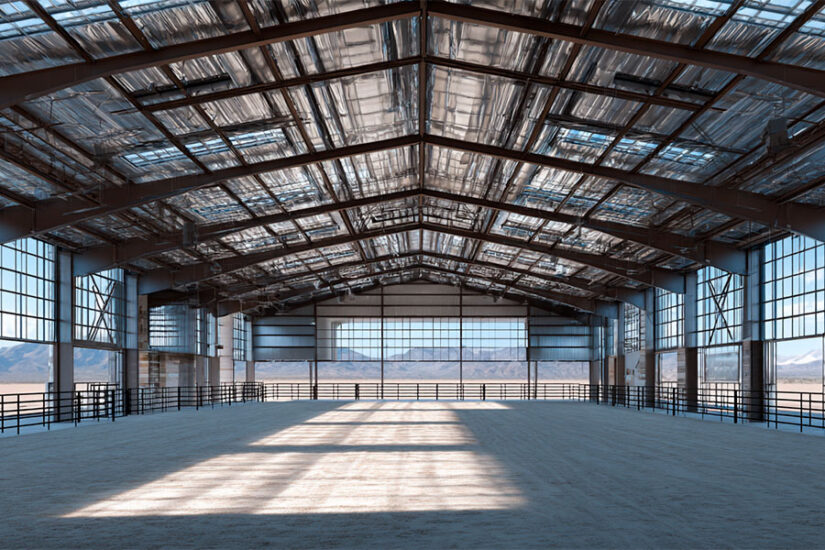
Weeks 9–10. Fit-out. Rail goes up. Mounting block goes in. Letter markers get bolted to the kickwall. The first ride is somewhere in this window. Most owners describe it as both anticlimactic and emotional. The horse usually doesn’t notice it’s a new arena.
That schedule assumes a clean build. Permit delays, weather, and steel-kit fabrication backlogs push the timeline to 14 to 16 weeks in the real world. Late-fall starts in cold climates almost always run into the spring of the following year before the project is finished.
Where the Money Actually Goes
For a 60×120 indoor arena in 2026, the budget breakdown looks roughly like this.
| Build type | Cost range | What’s included |
| Outdoor, basic | $20K–$35K | Base, drainage, concrete sand, pipe rail |
| Outdoor, premium | $35K–$60K | Same plus sand-with-fiber, lighting, gate |
| Indoor, budget | $90K–$130K | Steel kit, perimeter foundation, plain sand |
| Indoor, standard | $130K–$200K | Same plus fiber footing, LED lighting, two doors |
| Indoor, premium | $200K–$280K+ | Same plus engineered footing, insulation, viewing room |
The steel kit and its erection together account for 50 to 65 percent of an indoor build. The footing line can swing the budget by $25,000 between concrete sand and an engineered blend. For a full pricing breakdown by size, structure type, and US state, the indoor riding arena cost guide goes deeper.
What Goes Wrong, Most Often
A few patterns show up repeatedly on private arena builds. The ones owners regret hardest.
Building too small. A 60×100 sounds fine on paper. Inside eighteen months most owners wish they had built 60×120 or 70×140. The marginal cost at design time is $10K–$25K. The cost to add length later runs roughly double the original kit cost because the roof line and foundation have to be re-engineered. Build the bigger arena once.
Skipping the geotextile fabric. A $1,500 roll of fabric prevents the base from contaminating with native soil under repeated load. Skipping it saves $1,500 and costs $25,000 four years later when the base has to be ripped out and redone.
Pouring the slab too thin. A 4-inch slab works for arenas used only for riding. A 6-inch slab with rebar pays for itself if the arena will ever host a trailer, a tractor, or an event. The decision happens at slab-pour day and is unfixable later.
Underspecifying doors. A 10-foot end door catches the drag arms on every pass. Most owners discover this in week two of grooming the surface and wish they had spec’d a 12×14 minimum. The upcharge at order time is roughly $2K. The fix after the building is up is a new door frame and several thousand dollars more.
Going too deep on the footing. Four inches of sand sounds like more cushion. It isn’t. Two to three inches is the working range. Deeper footing is the most common cause of suspensory ligament issues showing up on a brand-new arena at year two.
If a DIY Arena is the Actual Plan
For owners who want to do as much of the build themselves as physically possible, an outdoor arena is the realistic ceiling. A 60×120 outdoor arena, fully built by an owner with a tractor, a backhoe rental, a few weekends, and a base contractor who supplies and installs the gravel layer, can land near $15K–$25K in materials. The owner does the grading (with rental equipment), the perimeter drain trench, the topsoil haul-off, the footing spread, and the rail install. The contractor does the base because compaction needs equipment that doesn’t rent affordably.
An indoor DIY arena, on the other hand, almost always ends up more expensive than hiring it out. The reasons are mechanical and structural. Steel erection by an uncertified crew voids the kit warranty. Foundation mistakes are unfixable. A homeowner-installed footing on a homeowner-installed base reads like a homeowner-installed arena inside two seasons. The honest DIY scope on an indoor build is: site selection, permit paperwork, the rail and fit-out, and project management. Everything else is hired.
Frequently Asked Questions
The sequence is site selection, permits, grading, drainage, base, foundation (indoor only), steel erection (indoor only), footing install, and fit-out. A 60×120 indoor arena takes 8 to 16 weeks. Outdoor takes 3 to 6.
A 60×120 outdoor arena costs $20K–$60K in 2026. The same size indoor with steel kit, perimeter foundation, fiber footing, LED lighting, and doors costs $130K–$200K for most US regions. Budget indoor builds start near $90K. Premium builds with engineered footing and insulation can exceed $250K.
Some of it. Site selection, permits, basic outdoor footing, rail fencing, and fit-out are all reasonable for an owner. Grading, drainage, base, foundation, and steel erection should be hired out. The grading and base are the single largest determinant of long-term performance, and steel erection by an uncertified crew usually voids the manufacturer warranty.
A 60×120 indoor takes 8 to 16 weeks from groundbreaking to first ride, with 10 weeks being typical. Outdoor of the same size takes 3 to 6 weeks. Permit review before groundbreaking adds another 2 to 10 weeks.
60×120 is the most common private size in the US. It works for dressage schooling, jumping up to a four-stride line, and reining patterns. For serious jumping, 60×130 to 60×140 is better. For trail and pleasure riding, 60×100 is acceptable. Olympic dimensions of 200×80 cost roughly 50 percent more to build.
Usually no. Most private indoor arenas use a perimeter strip foundation only, with footing sitting directly on the stone-dust sub-base. A full slab is only needed if the arena will host heavy equipment, double as event space, or be used in winter without footing in cold climates.
A Short Closing Thought
Most arena projects don’t fail at construction. They fail at the decisions made before construction starts. Pick the right site. Build one size larger than feels comfortable. Spend the money on the base. Don’t try to save by skipping drainage or geotextile. Hire the work that needs experience to do right, and own the parts that benefit from caring more about the outcome than a contractor would.
After all that, the build itself becomes a sequence of waiting weeks and small decisions. Which is, paradoxically, why owners who plan well usually look back on the project as easier than they expected.
More in This Guide
For the parts of the build that justify their own deeper read:
- Indoor riding arena cost – full pricing by size, type, and state.
- Horse arena construction – the contractor-grade engineering side: structural specs, code references, base and drainage engineering.
- Horse arena footing – materials and depth engineering deep dive.
- How big should a horse riding arena be? – sizing by discipline.
- Concrete slab thickness for steel buildings – slab spec for arena foundations.
References
Sources worth cross-checking against on build sequence, base compaction, footing, and code requirements. All URLs verified live as of May 2026.
- Penn State Extension (Eileen E. Fabian Wheeler, Ph.D., with Jennifer Zajaczkowski). Riding Arena Footing Material Selection and Management. extension.psu.edu
- Eileen Fabian Wheeler, Ph.D. Horse Stable and Riding Arena Design. Wiley-Blackwell, 2006. ISBN 9780813828596 – the textbook on equestrian facility planning.
- United States Dressage Federation (USDF). Arena dimensions for licensed dressage competition. usdf.org
- International Code Council. International Building Code (IBC), 2024 edition – wind-load requirements for accessory steel structures. codes.iccsafe.org